Table of Contents
- The Cost of Getting Sign Installation Wrong
- Mistake 1: Skipping the Signage Permit Application Process
- Mistake 2: Ignoring ADA Signage Compliance Requirements
- Mistake 3: Poor Sign Placement and Blocked Sightlines
- Mistake 4: Weak Mounting Hardware and Structural Integrity
- Mistake 5: Overlooking Weather Resistance and Lighting Design
- Using the Best Tools for Professional Sign Installation
- Frequently Asked Questions
Last Updated: September 4, 2026
The Cost of Getting Sign Installation Wrong
A sign that falls, fails, or violates local rules costs far more than the initial installation price. Between re-fabrication, permit fines, liability for property damage, and the branding damage of a crooked or unreadable sign, the true cost of a botched job often doubles or triples the original budget. Avoiding common mistakes protects your investment and your legal standing.
At Triton Sign, we have spent over 30 years of combined industry experience fixing installations that were rushed or under-engineered. The most frequent issues we see are process failures: skipped permits, ignored compliance rules, and improper mounting. This guide breaks down the five most common and costly errors so you can avoid them on your next project.
Mistake 1: Skipping the Signage Permit Application Process
The most frequent and avoidable error is failing to secure a permit before installation begins. Most municipalities require a signage permit application process that reviews your sign against local zoning ordinances, size restrictions, and placement rules before any work starts.
Skipping this step can lead to stop-work orders, daily fines, and a mandate to remove a sign you have already paid to fabricate and install. The International Code Council guidelines on signage and permitting outline how local jurisdictions adopt and enforce these standards. You must verify requirements with your specific city or county building department, as rules vary significantly by location and zone. Factor permit review time into your project schedule, as approval can take several weeks depending on the jurisdiction.
Mistake 2: Ignoring ADA Signage Compliance Requirements
Accessibility is not optional, and ignoring ADA signage compliance requirements is a legal liability discovered too late. The Americans with Disabilities Act (ADA) sets strict standards for tactile lettering, Braille, mounting heights, and contrast ratios for signs that identify permanent rooms and spaces.
Non-compliant signs mean renovation delays, failed inspections, and exposure to discrimination lawsuits. The U.S. Department of Justice ADA Standards specify that tactile characters must be a minimum size, mounted at a specific height range, and placed on the latch side of the door. A common mistake is treating ADA compliance as a design afterthought rather than a technical specification. Work with a fabricator who understands these requirements during the design phase, not after the sign is built.
Mistake 3: Poor Sign Placement and Blocked Sightlines
A sign that is technically installed but visually obstructed fails its primary purpose. Poor placement ignores sightlines, traffic flow, and viewing angles, rendering your investment nearly useless.
Before mounting, conduct a site survey to identify where drivers and pedestrians actually look. Landscaping that matures and blocks the sign, or a mounting height that disappears behind parked vehicles, are common failures. Local zoning ordinances often regulate how close a sign can be to a roadway and maximum height limits to preserve sightlines for traffic safety. The Federal Highway Administration guidance on sign visibility emphasizes that legibility is directly tied to viewing distance and environmental clutter. Test the proposed location from primary approach angles before committing to the installation.
Mistake 4: Weak Mounting Hardware and Structural Integrity
The most dangerous mistake is underestimating the structural demands on the sign and its mounting hardware. A sign acts as a sail in high winds, and inadequate anchoring or an unsuitable substrate can lead to catastrophic failure. This is a matter of engineering, not guesswork.
Structural integrity depends on matching the mounting system to the wall material, the sign’s weight, and local wind loads. A bracket secured only to brick veneer or exterior insulation finishing system (EIFS) will pull out over time: brick veneer is a cladding, not a structural element, and EIFS has almost no pull-out strength. Fasteners must penetrate into the load-bearing masonry or steel stud behind it.
Fastener selection is governed by the substrate. For concrete or masonry, wedge anchors or chemical (epoxy) anchors are required for heavy signs. For steel studs, self-tapping screws are necessary, but the stud gauge matters, a 25-gauge stud will deform where a 16-gauge stud will hold. For wood framing, lag bolts must penetrate at least 1.5 inches into the structural member.
Spacing and edge distance are equally critical. Fasteners placed too close to an edge can cause spalling or blowout. The rule of thumb is a minimum edge distance of five times the anchor diameter for concrete, and two and a half times for masonry. Torque values matter: over-tightening can crush the substrate or strip threads, while under-tightening leaves the sign loose.
Wind load calculations are not optional for larger signs. The American Society of Civil Engineers (ASCE) publishes the standard (ASCE 7) that most local building codes adopt for determining wind loads. The calculation depends on the sign’s height, local basic wind speed, and exposure category. A 4-foot by 8-foot sign in an open field experiences far different forces than the same sign between two buildings.
Most jurisdictions require a licensed structural engineer’s stamp on mounting details for signs exceeding a certain size or height threshold, often 6 feet above grade or 20 square feet in area. This is a safety check, not red tape. The engineer verifies the sign can withstand the 100-year wind event and that the mounting system transfers the load safely.
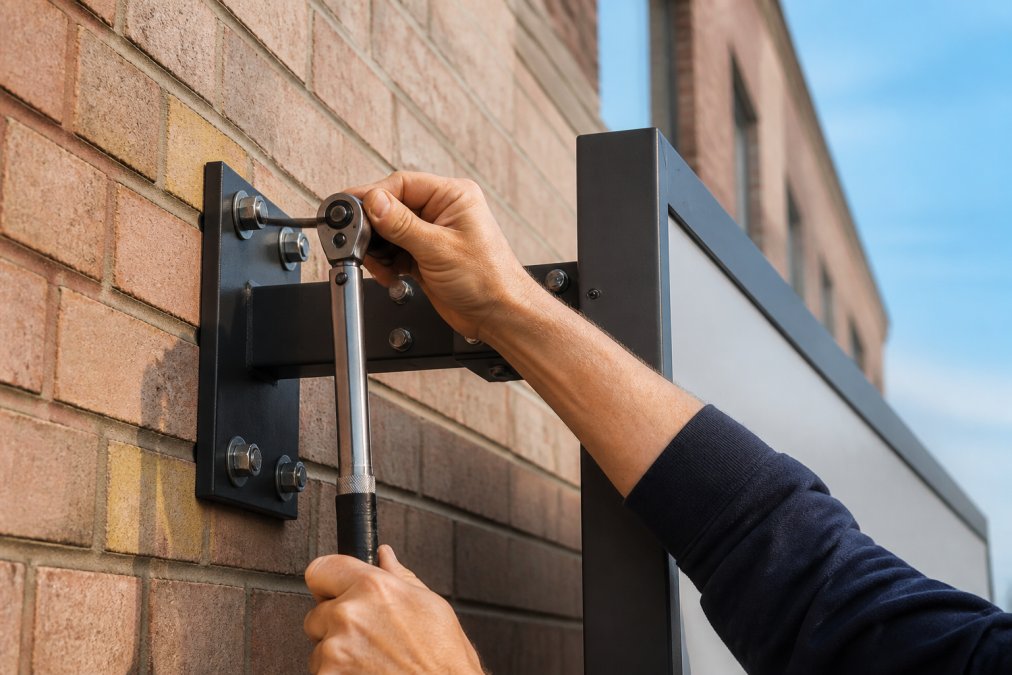
Never guess at fastener size or wall anchoring. A sign that falls and injures someone or damages property exposes you to serious liability. When in doubt, consult a structural engineer for large or heavy installations.
A common failure pattern is the “contractor special”: a sign mounted with drywall screws into a hollow wall, or with a single lag bolt into a stud not verified with a pilot hole. The sign holds for a few months, then a windstorm pulls it free. The repair cost, not to mention the liability, far exceeds the cost of doing it right the first time.
For channel letters or cabinet signs mounted on a raceway, the raceway itself must be rated for the load. A thin-gauge aluminum raceway will flex and fatigue, eventually cracking at the weld points. Mounting brackets must be welded or bolted with sufficient attachment points, not just spot-welded at the corners.
Finally, consider the sign’s center of gravity. A top-heavy or offset sign creates a lever arm that multiplies force on the fasteners. The mounting system must resist both shear (vertical load) and pull-out (horizontal wind load). A simple angle bracket may handle shear but fail on pull-out if the anchor is not rated for tension.
In practice, the difference between a safe installation and a dangerous one is often a few dollars in fasteners and an hour of engineering review. That is a small price to pay for avoiding a sign that comes down on a customer’s car, or a customer.
Mistake 5: Overlooking Weather Resistance and Lighting Design
Exterior signage endures constant exposure, and overlooking weather resistance leads to premature failure and faded branding. The substrate, paint, and internal components must be rated for your specific climate. The most common mistake is treating installation as the finish line rather than the starting point of a maintenance lifecycle.
Lighting design is equally critical but often mishandled. Poorly aimed fixtures create glare, wash out the sign face, or leave dark spots that make the sign unreadable at night. Electrical connections must be weatherproof and grounded per the National Electrical Code requirements for outdoor signage. The choice between LED channel letters and a backlit cabinet changes the electrical load and maintenance needs.
The sign you install today is a liability you will manage for the next 10 to 20 years. A sign not designed for maintainability will cost you far more than the initial installation savings.
Material selection determines your maintenance schedule. An aluminum composite panel (ACM) with a polyvinylidene fluoride (PVDF) coating will hold its color for 10-15 years in most climates. A painted MDF or plywood substrate will need repainting every 2-3 years and may delaminate after a single wet season. High-density urethane (HDU) is a better choice for dimensional letters because it does not rot or warp, but it requires a proper primer and topcoat to resist UV degradation.
Fastener corrosion is a silent killer. Stainless steel fasteners are non-negotiable in coastal environments where salt spray accelerates galvanic corrosion. Inland, zinc-plated fasteners may suffice in dry climates. Corrosion products expand and can crack the sign face or loosen the mounting. Use a dielectric anti-seize compound on dissimilar metals to prevent galvanic corrosion.
Sealants and gaskets have a finite life. The silicone or butyl sealant around the sign’s edges, and the gaskets around light fixtures, will dry out and crack within 5-7 years. When they fail, water enters the cabinet, corrodes electrical connections, and shortens LED life. Re-seal every 5 years and replace gaskets whenever the sign is opened for service.
LED lighting has a predictable failure curve. While LEDs are rated for 50,000 hours (about 5.7 years of continuous operation), drivers and power supplies typically fail sooner, often at 3-5 years. Heat inside a sealed cabinet accelerates driver failure. Choose a sign with a serviceable driver that can be replaced without removing the entire face. LEDs also gradually shift in color and lose brightness; two signs installed a year apart may look noticeably different by year three.
Cleaning is not cosmetic; it is protective. Dirt and grime reduce light transmission by up to 30% over a year, making LEDs work harder and run hotter. Bird droppings are acidic and will etch the sign face. A quarterly wash with mild soap and water will extend the sign’s life and keep it legible.
Plan for the replacement cycle. A sign’s useful life is typically 7-10 years for a backlit cabinet, 10-15 years for LED channel letters, and 15-20 years for a non-illuminated monument sign. The mounting structure should be designed to outlast two or three sign faces. When replacing the face, inspect the structure for corrosion, concrete spalling, and fastener fatigue. Reusing a 20-year-old pole is a false economy if it has rusted from the inside.
Create a maintenance log at installation. Record the fastener type, sealant used, LED driver model, and the date of installation. This documentation will save hours of diagnostic time when a sign fails in year four, and it will help you budget for the next replacement cycle.
The cost of neglect is measurable. A sign that fails prematurely costs you the replacement, the crane rental, the electrician’s time, and lost advertising revenue while dark. For drive-by traffic, a dark sign can cost hundreds of dollars per day. The maintenance budget should be 3-5% of the initial installation cost per year, $150 to $250 on a $5,000 sign, a small price for protecting a 10-year asset.
By planning for the lifecycle from day one, you avoid installing a sign that looks great on day one but is a maintenance nightmare by year three.
Using the Best Tools for Professional Sign Installation
Using the best tools for professional sign installation is about precision and safety. Laser levels ensure perfect alignment, torque wrenches prevent over-tightening that cracks substrates, and stud finders locate solid anchoring points.
| Phase | Critical Tool | Purpose |
|---|---|---|
| Layout | Laser level, chalk line | Ensures exact placement and alignment |
| Mounting | Torque wrench, hammer drill | Correct fastener tension and clean holes |
| Electrical | Voltage tester, GFCI outlet | Safe power connections and code compliance |
| Verification | Digital angle finder | Confirms plumb and level installation |
For most businesses, the question is not which tools to buy but whether to handle installation in-house at all. DIY risks are substantial: incorrect anchoring, code violations, and voided manufacturer warranties. Professional teams bring the tools plus insurance, safety training, and experience with local regulations. A professional partner handles the signage permit application process, coordinates inspections, and stands behind the work. Contact Triton Sign to discuss your next installation project with a team that delivers on time and on budget.
Frequently Asked Questions
What are the most common mistakes made during exterior sign installation?
The most frequent errors include skipping the permit process, neglecting structural and wind-load calculations, poor placement that blocks sightlines, and using inadequate mounting hardware. Many also overlook ADA signage compliance requirements for permanent room identification. These issues lead to fines, safety hazards, and costly reinstallation. Working with an experienced installer who handles permitting and structural assessments from the start prevents these problems.
How do you ensure exterior signage is compliant with local building codes?
Compliance starts with the signage permit application process before fabrication. Your local jurisdiction will review your plans against zoning ordinances and building codes. You must also meet ADA signage compliance requirements, which dictate character height, contrast, and mounting location. A professional sign company manages this process, ensuring your sign meets all safety and accessibility standards and passes final inspections.
What materials are best for weatherproofing outdoor signs?
The best choice depends on your environment, but aluminum composite material (ACM) and high-density urethane (HDU) are popular for their durability and weather resistance. Ensure all mounting hardware is stainless steel or galvanized to prevent corrosion. Proper sealing of edges and using weatherproof LED modules for illuminated signs also extend the life of your installation and maintain its appearance.
Why is professional structural assessment critical for sign installation?
A sign that isn’t engineered for its location is a liability. A professional structural assessment calculates wind load, ensuring the mounting hardware and building structure can handle severe weather. This is especially important for large or projecting signs. Skipping this step risks the sign detaching and causing property damage or injury. It also ensures your installation meets local safety standards and insurance requirements.