Last Updated: October 30, 2026
Quick Summary
To avoid delays in custom sign manufacturing, lock design readiness, approvals, permits, and material supply before production starts. Confirm production-ready vector artwork, name one approver with a fixed revision limit, map all four permit layers, and flag long-lead components on the bill of materials early.
- Most schedule risk sits in four delay points, and three are controlled by the customer before production begins.
- Ask your fabricator for a stage-by-stage timeline, not a single delivery date.
- Write the revision number and date on the purchase order so the approved version is provable.
- Map municipal permit, zoning or design review, landlord consent, and electrical permit as separate clocks.
- Set a substitution decision date for every long-lead item, typically when the production slot is confirmed.
Table of Contents
- Why Custom Sign Projects Slip: The 4 Delay Points
- How Long Custom Sign Manufacturing Lead Time Actually Runs
- The Custom Sign Order Checklist That Prevents Most Delays
- Step 1: Lock Design Readiness Before Artwork Leaves Your Desk
- Step 2: Run a Tight Sign Design Approval Process
- Step 3: Clear Sign Permitting Requirements Before Fabrication
- Step 4: Protect Material Availability and Production Capacity
- Step 5: Track the Production Schedule and Escalate Early
- Frequently Asked Questions
Why Custom Sign Projects Slip: The 4 Delay Points
Most custom sign manufacturing delays start weeks before the shop floor, in a design file that wasn’t ready, a permit nobody filed, or a purchase order with the wrong quantity.
The four delay points are:
- Design readiness, artwork that isn’t production-ready when it reaches the fabricator
- Approval handoffs, revisions that bounce back and forth without a clear owner
- Permitting, sign permits filed after fabrication has already started
Three of those four happen before a single sheet of material gets cut, so the customer controls most of the schedule risk, not the shop.
Most schedule risk sits in four delay points, and three of them are controlled by the customer before production begins.
| Delay point | What goes wrong |
|---|---|
| Design readiness | Artwork isn’t production-ready when it reaches the fabricator |
| Approval handoffs | Revisions bounce back and forth without a clear owner |
| Permitting | Sign permits filed after fabrication has already started |
| Material and capacity | Components ordered late or production slots double-booked |
How Long Custom Sign Manufacturing Lead Time Actually Runs
Custom sign manufacturing lead time is the total time from approved final design to a sign ready to install.
A typical custom sign order moves through five stages:
- Design finalization and proof approval
- Material ordering and component sourcing
- Fabrication and production scheduling
- Quality checks and any rework
- Shipping or staging for installation
Each stage has its own clock, and a slip in stage one pushes every stage after it. For where the hours go inside the shop, the custom sign fabrication process step by step walks through each production stage.
Ask your fabricator for a stage-by-stage timeline, not a single delivery date. A single date hides where the risk sits.
The Custom Sign Order Checklist That Prevents Most Delays
A custom sign order checklist is a pre-order list of specs, approvals, and site details confirmed before the purchase order is issued. Disruption often traces back to something never confirmed at this stage.
- Final artwork approved in the correct file format
- Exact dimensions and quantities confirmed in writing
- Sign material and finish specified
Order Specifications and Purchase Order Details
The purchase order governs the whole job, so treat it as a contract. Every line item should match the approved artwork exactly: quantities, dimensions, colors, material, and finish.
A common mistake is a PO that says “per approved proof” without attaching the proof; when a revision happens later, nobody can prove which version was approved. Write the revision number and date on the PO itself to help prevent quantity and pricing disputes.
Site Survey and Installation Access
Site survey work confirms the sign will fit, mount, and be reachable on installation day. Skipping it can create a delay that is hard to recover from.
Confirm these before fabrication:
- Wall or mounting surface type and condition
- Exact mounting height and clearances
- Power access if the sign is illuminated
A sign that’s built correctly but can’t be installed on schedule is still a late sign.
Step 1: Lock Design Readiness Before Artwork Leaves Your Desk
Design readiness means the artwork is complete, correctly sized, and built for how the sign will actually be manufactured. Artwork that looks fine on a screen can fail at fabrication.
Low-resolution images and logos pulled from a website are the classic culprits: sharp on a monitor, blurry on a large-format sign. Vector files scale; screenshots don’t.
Before you send files, confirm:
- Vector artwork or high-resolution files at final size
- Correct color mode for the material and print method
- Proper bleed and safe margins
Step 2: Run a Tight Sign Design Approval Process
A sign design approval process moves artwork from draft to a signed-off final design, with each revision logged and owned.

Set clear rules up front:
- Name one approver on the customer side
- Set a revision deadline for each round
- Limit rounds of design revisions to a fixed number
Managing Revisions and Approval Handoffs
Revisions and approval handoffs are where schedules quietly bleed. A proof goes out, sits in an inbox for a week, comes back with a change, and the cycle repeats.
If your team handles frequent changes, managing signage design revisions covers the handoff mechanics in more detail.
Approving a proof by replying “looks good” without checking dimensions and color against the spec is how rework gets baked into the schedule.
Step 3: Clear Sign Permitting Requirements Before Fabrication
Sign permitting requirements are the local rules governing whether, where, and how large a sign can be installed. Filing after fabrication starts is one of the most expensive delay points, because a rejected permit can force a redesign of a sign that’s already built.
The Four Approval Layers Most Projects Miss
A custom sign usually needs sign-off from more than one authority. Treat each layer as a separate clock on your schedule.
- Municipal sign permit. Issued by the local building or planning department under the sign code. This is the layer everyone remembers.
- Zoning or design review. Applies when the sign is in a historic district, a design overlay, or a planned development. Review boards often meet on a fixed calendar, so a missed submittal deadline can add a significant delay.
- Landlord or property-management approval. For tenant signage, the lease or sign criteria usually require written landlord consent and sometimes a specific sign vendor. This approval is private, not public, and it is the single most common cause of a stalled permit package.
- Electrical permit. Required for illuminated signs and separate from the sign permit in many jurisdictions. It is often pulled by the electrical contractor, not the sign fabricator, which creates a handoff gap.
Projects often clear the municipal sign permit quickly, then stall for weeks waiting on landlord consent nobody requested. Map all four layers before you finalize the design.
What Permit Reviewers Actually Ask For
Before you submit, confirm the package includes:
- A site plan showing the sign location, property lines, and setbacks
- Elevations drawn to scale with dimensions, copy, and mounting height
- A sign detail drawing showing materials, attachment method, and footing or wall anchorage
A rejected submittal can restart the review clock rather than resuming it.
Ask the local permitting authority whether this sign type requires design review or a public hearing, and what the current review turnaround is.
Site Readiness Checks That Run Alongside Permitting
Permitting and site readiness should be worked in parallel, not in sequence. While the permit is in review, confirm:
- The mounting surface is structurally adequate for the sign’s weight and wind load
- The electrical service and disconnect location are confirmed for illuminated signs
- The installation crew has legal access to the mounting location, including roof access, loading zones, and any required escorts
A sign that is permitted, fabricated, and delivered but cannot be installed because the roof hatch is locked is still a late sign. For a practical walkthrough of the filing sequence, how to get permits for custom business signs covers what to prepare before fabrication.
Step 4: Protect Material Availability and Production Capacity
Material availability and production capacity are the two supply-side risks you can’t fully control, but you can plan around them. Sign material lead times move with supplier stock, and production schedules fill up during busy seasons. The gap most guides leave open is that sign fabrication depends on a handful of long-lead components that are not the sheet material, and those components are where schedules actually break.
Identify Long-Lead Components, Not Just Sheet Stock
Sheet goods like aluminum composite, acrylic, and sign foam are usually stocked regionally and reorder in days. The long-lead items are the components bolted to them:
- LED modules and power supplies. Brand-specific drivers and modules can run weeks out when a distributor is between shipments.
- Custom extrusions and fabricated frames. Cabinet returns, raceways, and monument frames are made to order.
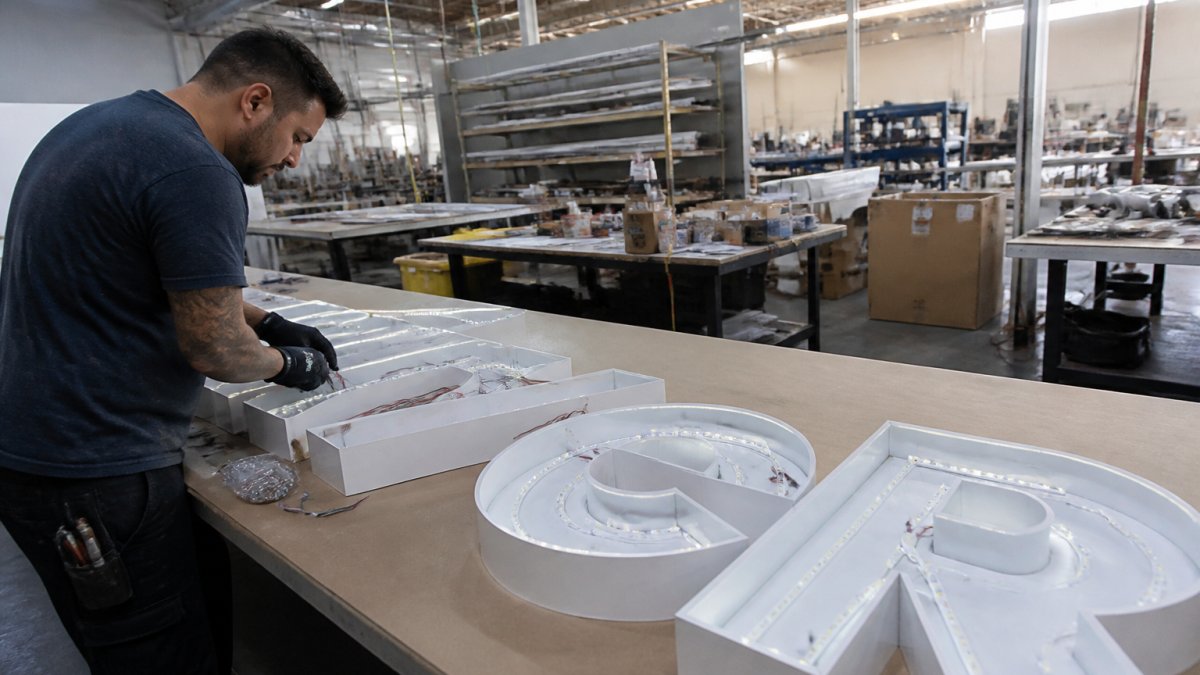
- Illuminated letters and channel letters. Faces, returns, and trim caps are fabricated per job and cannot be pulled from stock.
Ask your fabricator to flag every line item on the bill of materials that is not a stocked commodity. Those are the items to lock first.
Run a Stock Check Before the Purchase Order Is Issued
A stock check is a documented confirmation that each specified material and component is either on hand, on order with a confirmed date, or approved for substitution. Do it at the order stage, not at the production stage.
For each sign, record:
- Primary material and finish, with the supplier and part number
- Current stock status and confirmed lead time
- Approved substitute material and finish
Set a substitution decision date for every long-lead item, typically the day the production slot is confirmed. If the primary component is not confirmed by that date, the approved substitute goes into production automatically. A pre-agreed rule prevents the stall that happens when nobody wants to make the call.
Protect the Production Slot
Production capacity is the second half of the risk. Sign shops schedule by station, routing, forming, welding, paint, electrical, and assembly, and a busy paint line can bottleneck a job that is otherwise ready.
Ask two questions early:
- Is there a confirmed production slot for this job, with a start date?
- Which station is the constraint, and does the schedule account for it?
If either answer is uncertain, decide now rather than later. Substituting a comparable material early costs far less than discovering a shortage mid-build, and moving a job into an earlier open slot is easier before the schedule fills than after.
Build a Backup Plan Into the Order
Supply-chain contingencies are the backup plans you set before a shortage hits. A simple approach is to name a first-choice material and an approved alternative for every job, and to write both into the purchase order so the fabricator can act without a new approval cycle.
That way, a supplier delay triggers a decision instead of a stall.
Step 5: Track the Production Schedule and Escalate Early
Production schedule tracking means checking the job against its stage-by-stage timeline at fixed intervals, not waiting for the delivery date to find out something slipped.
Set a check-in cadence with your fabricator suited to the project’s size. At each check, confirm the current stage, the next milestone, and any risk to the delivery date.
Escalate the moment a milestone is at risk, not after it’s missed. If communication between the design and production sides is where things break down for your team, improving communication between sign designers and fabricators covers how to keep both sides aligned.
If a delay is already happening, the recovery plan is the same every time: confirm the new date in writing, identify which stage caused the slip, and decide together whether expedited shipping or a phased installation gets you back on track. For the patterns behind most slippage, why signage projects miss deadlines is worth reading before your next order.
They fail because design, approvals, permits, and materials weren’t locked down before production started.
Frequently Asked Questions
What are the most common reasons custom sign projects are delayed?
Most delays trace back to four points: incomplete design files, slow proof approval, permit waits, and material or capacity shortfalls. Low-resolution images and missing logos force redesign, which pushes the whole schedule. Unapproved artwork cannot move to fabrication, and permits can add weeks if filed late. Treat each of these as a gate to clear before the next stage begins.
How long does custom sign manufacturing usually take?
Custom sign manufacturing lead time varies by sign type, material, and shop capacity, so ask for a written schedule at quote stage rather than assuming a standard number. The timeline usually splits into design and proofing, permitting, fabrication, and installation coordination. Complex fabricated exterior signs take longer than flat interior graphics. Get each stage dated in writing, then track against those dates so a slip in one phase is visible before it affects delivery.
What information should I provide to avoid delays when ordering a custom sign?
Bring a complete custom sign order checklist: exact dimensions, quantities, sign type, material preference, site address, installation surface, and vector artwork or high-resolution files. Confirm who has final approval authority and how revisions will be routed. Note any permitting requirements and site access restrictions. Accurate order specifications and a clean purchase order prevent the back-and-forth that stalls production scheduling.
Can permitting or site conditions delay sign installation?
Yes. Sign permitting requirements vary by jurisdiction and sign type, and filing late can push installation past your opening date. Site conditions matter too: blocked access, unfinished walls, or missing electrical rough-in can stop an install crew on arrival. Confirm permit status and walk the site before the fabrication window closes, and coordinate installation access with the general contractor so the crew is not turned away.
