Table of Contents
- Why Consistent Signage Matters Across Multiple Sites
- Step 1: Establish a Centralized Content Management System
- Step 2: Create Signage Brand Guidelines Template for All Locations
- Step 3: Standardize Hardware and Software Across Sites
- Step 4: Plan Your Deployment Strategy and Rollout Timeline
- Step 5: Implement ADA Signage Compliance Requirements at Every Location
- Step 6: Maintain Consistency with a Business Signage Maintenance Checklist
- Monitoring, Training, and Long-Term Success
- Frequently Asked Questions
Last Updated: September 1, 2026
Why Consistent Signage Matters Across Multiple Sites
Inconsistent signage across locations undermines trust and dilutes brand impact. As you scale from one location to many, inconsistency creeps in through different installers, aging hardware, and missed updates. Consistent signage requires three things: a clear system, enforced standards, and ongoing oversight. This guide covers centralized content management, hardware standardization, compliance requirements, and maintenance discipline. At Triton Sign, we’ve guided multi-location clients through this process, helping them achieve stronger brand recognition, faster deployments, and lower long-term costs.
Step 1: Establish a Centralized Content Management System
A centralized dashboard is where consistency begins. Without it, you’re managing signage through email, spreadsheets, and phone calls, a recipe for errors and delays.
Your content management system should allow you to upload and schedule content updates across all locations simultaneously, track which locations have received updates and when, set permissions for regional managers without breaking brand standards, monitor real-time display status, and archive historical content for compliance.
Cloud-based platforms offer significant advantages over local servers: they eliminate IT infrastructure needs at each location, reduce bandwidth strain, ensure automatic backups, and enable remote content deployment without technician visits. Prioritize integration capability so the system connects with your design tools, email systems, and reporting software, reducing manual data entry and errors.
Start by auditing your current workflow. How many people touch signage decisions? How long do updates take to roll out? Where do mistakes occur? The answers reveal what your system must solve.
Step 2: Create Signage Brand Guidelines Template for All Locations
A written brand guidelines template is your enforcement mechanism. It’s the document installers reference, regional managers follow, and auditors use to verify compliance.
Your template should cover color specifications (RGB, CMYK, Pantone values), typography (approved fonts, sizes, weights, spacing), logo placement and sizing, messaging standards, material specifications, installation standards (mounting heights, viewing distances, lighting, accessibility), and maintenance protocols.

Make the template visual. Show examples of correct installations at different site types and include photos of compliance versus deviation. Distribute it in multiple formats: digital PDF, web-accessible version, and printed copies at each location. Version-control updates whenever brand standards change.
Pair your written guidelines with site-specific sign-offs. Before installation begins, get written approval from a brand representative confirming that the location’s signage meets the template.
Step 3: Standardize Hardware and Software Across Sites
Choose a single hardware platform for each sign type and stick with it across all sites. Same media player, mounting bracket, and cable specification. This simplifies training, reduces spare-parts inventory, and ensures consistent performance.
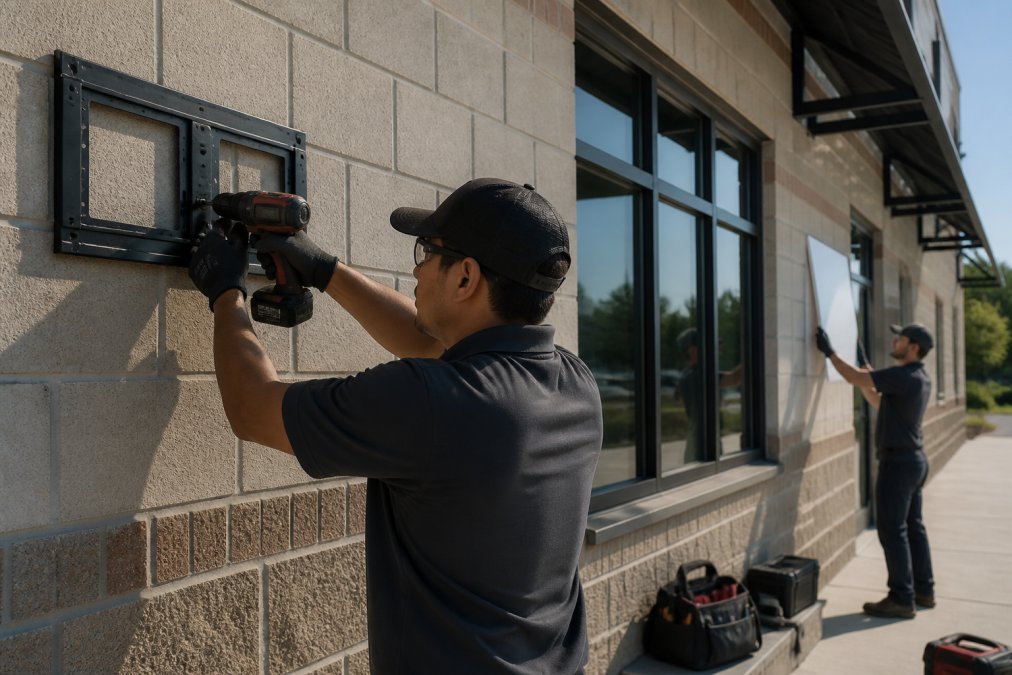
All displays should run the same operating system version, content management client, and security patches. Staggered software versions create support fragmentation and unpredictable behavior.
Document hardware specifications in your brand guidelines: exact model numbers, approved display resolutions, network connectivity requirements, power specifications, environmental ratings, and warranty terms. When a component fails, replace it with an identical unit, no improvisation.
Deploy firmware updates across all locations simultaneously during low-traffic hours with a rollback plan ready. Staggered updates create unpredictable behavior and support confusion.
Step 4: Plan Your Deployment Strategy and Rollout Timeline
Start with a pilot location to test processes and troubleshoot before rolling out to other sites. Use the pilot to validate installation procedures, installer training, content management workflow, maintenance procedures, and staff comfort with new hardware.
After the pilot succeeds, establish a phased rollout timeline. Group locations by geography or operational similarity and deploy to 3-5 locations per phase with 2-4 weeks between phases. This pace allows your team to handle problems without being overwhelmed and lets you refine procedures based on what you learn.
Document every step: installation sequence, personnel assignments, equipment needs, testing procedures, contingency plans, and communication protocols. Share this plan with all stakeholders before deployment begins.
Step 5: Implement ADA Signage Compliance Requirements at Every Location
ADA signage compliance is non-negotiable. Non-compliance exposes your organization to legal liability and excludes customers from your spaces (eeoc.gov).
ADA requirements include character sizing (at least 5/8 inch high for viewing distances up to 15 feet), contrast ratios (at least 3:1 between text and background), sans-serif fonts with consistent stroke width, raised Braille characters, mounting height (48-60 inches from floor to sign center), and tactile elements where required (ada.gov).
Specific requirements depend on sign type. Design signs for compliance from the start, it’s far cheaper than remaking signs after installation. Include ADA specifications in your brand guidelines template and verify compliance during installation sign-off.
Maintain documentation of ADA compliance for each location: what signage is present, what standards it meets, and when it was last inspected. This documentation protects you if an accessibility complaint arises.
Step 6: Maintain Consistency with a Business Signage Maintenance Checklist
Over time, signage degrades. Paint fades, digital displays develop dead pixels, and mounting hardware corrodes. Without maintenance discipline, your signage drifts toward inconsistency.
A business signage maintenance checklist ensures every location receives the same care on the same schedule. Address visual inspection, cleaning, lighting verification, digital display health, hardware inspection, content verification, and documentation.
Assign maintenance responsibility to a specific person at each location and hold them accountable for monthly completion. Schedule preventive maintenance during low-traffic periods. A 30-minute monthly inspection beats a 6-hour emergency repair.
When maintenance reveals a problem, document it immediately: what needs repair, when discovered, and when completed. This documentation proves compliance, identifies recurring problems, and supports warranty claims.
Monitoring, Training, and Long-Term Success
Consistency requires ongoing attention through monitoring systems, staff training, and regular audits.
Monitoring systems should track signage status across all locations in real time. Digital displays should report status to your content management system with automated alerts for network disconnection, low power, hardware failure, or content sync delays. For non-digital signage, establish quarterly photo documentation to create a visual record and make inconsistencies obvious.
Staff training is where most programs fail. Invest in comprehensive training covering brand identity, specific procedures, troubleshooting, content management system use, ADA compliance, and when to escalate problems. Train new staff before they touch signage and document completion.
Regular audits should compare actual signage against brand guidelines quarterly at minimum. Use a standardized checklist, photograph signage at each location, and compare color accuracy, font usage, messaging, installation quality, and ADA compliance. Address deviations quickly and revise your approach if patterns emerge.
Organizations that succeed treat consistent signage as an ongoing operational discipline, not a one-time project. They assign clear ownership, invest in training, monitor actively, and course-correct regularly.
Maintaining consistent signage across multiple locations is a systems problem, not a creative one. You need clear standards, enforced processes, and accountability at every step. Triton Sign has helped Seattle-area organizations build these systems, from growing retailers opening new locations to construction firms standardizing signage across job sites. We bring 30 years of combined experience in design, fabrication, and installation, ensuring your signage looks consistent and performs reliably under real-world conditions. Whether you need ADA-compliant signage, digital display networks, or custom exterior graphics, our team understands the operational discipline required to maintain consistency at scale. Contact Triton Sign to discuss your multi-location signage strategy and get started on a deployment plan that actually works.
=== FAQ ANSWERS (audit these too, same rules) ===
[1] Q: How do you maintain brand consistency in signage across different regions?
A: Start with a centralized content management system that controls all signage updates from one dashboard. Use standardized brand guidelines templates that specify colors, fonts, logos, and spacing for every location. Deploy identical hardware and software platforms so displays render the same way everywhere. Schedule regular audits to catch inconsistencies early, and establish a single approval process before any content goes live. This prevents regional teams from making unauthorized changes that break brand identity.
[2] Q: What are the most common signage mistakes when scaling a business?
A: The biggest mistakes are: failing to standardize hardware before adding locations (different displays show content differently), skipping brand guidelines documentation (each site interprets branding differently), not planning network security (signage networks become vulnerable), and poor change management (staff don’t understand the new system). Avoid these by documenting everything upfront, training all teams on the same processes, and using a centralized platform that prevents unauthorized edits. Also budget for ongoing maintenance, many companies cut corners here and signs become outdated or damaged.
[3] Q: What role does an ADA compliance audit play in multi-location signage?
A: An ADA compliance audit ensures every location meets federal accessibility standards for signage. This includes checking character height, contrast ratios, tactile elements, and braille placement. Audits prevent costly legal issues and ensure all customers can navigate your spaces. When rolling out signage across multiple locations, conduct an audit at your first installation, document the specifications, then apply those same standards to every other site. This makes compliance automatic rather than reactive.
[4] Q: How can you balance local relevance with corporate branding in signage?
A: Use a tiered approach: lock corporate elements (logo, brand colors, main messaging) in your centralized system so they stay consistent everywhere. Create designated zones in your templates where locations can add local information, store hours, regional phone numbers, local promotions, without breaking the overall brand identity. Document which elements are fixed and which are flexible in your brand guidelines template. This gives regional managers autonomy while protecting your visual identity.
Frequently Asked Questions
Q: How do you maintain brand consistency in signage across different regions?
A: Start with a centralized content management system that controls all signage updates from one dashboard. Use standardized brand guidelines templates that specify colors, fonts, logos, and spacing for every location. Deploy identical hardware and software platforms so displays render the same way everywhere. Schedule regular audits to catch inconsistencies early, and establish a single approval process before any content goes live. This prevents regional teams from making unauthorized changes that break brand identity.
Q: What are the most common signage mistakes when scaling a business?
A: The biggest mistakes are: failing to standardize hardware before adding locations (different displays show content differently), skipping brand guidelines documentation (each site interprets branding differently), not planning network security (signage networks become vulnerable), and poor change management (staff don’t understand the new system). Avoid these by documenting everything upfront, training all teams on the same processes, and using a centralized platform that prevents unauthorized edits. Also budget for ongoing maintenance, many companies cut corners here and signs become outdated or damaged.
Q: What role does an ADA compliance audit play in multi-location signage?
A: An ADA compliance audit ensures every location meets federal accessibility standards for signage. This includes checking character height, contrast ratios, tactile elements, and braille placement. Audits prevent costly legal issues and ensure all customers can navigate your spaces. When rolling out signage across multiple locations, conduct an audit at your first installation, document the specifications, then apply those same standards to every other site. This makes compliance automatic rather than reactive.
Q: How can you balance local relevance with corporate branding in signage?
A: Use a tiered approach: lock corporate elements (logo, brand colors, main messaging) in your centralized system so they stay consistent everywhere. Create designated zones in your templates where locations can add local information, store hours, regional phone numbers, local promotions, without breaking the overall brand identity. Document which elements are fixed and which are flexible in your brand guidelines template. This gives regional managers autonomy while protecting your visual identity.
This article was written using GrandRanker