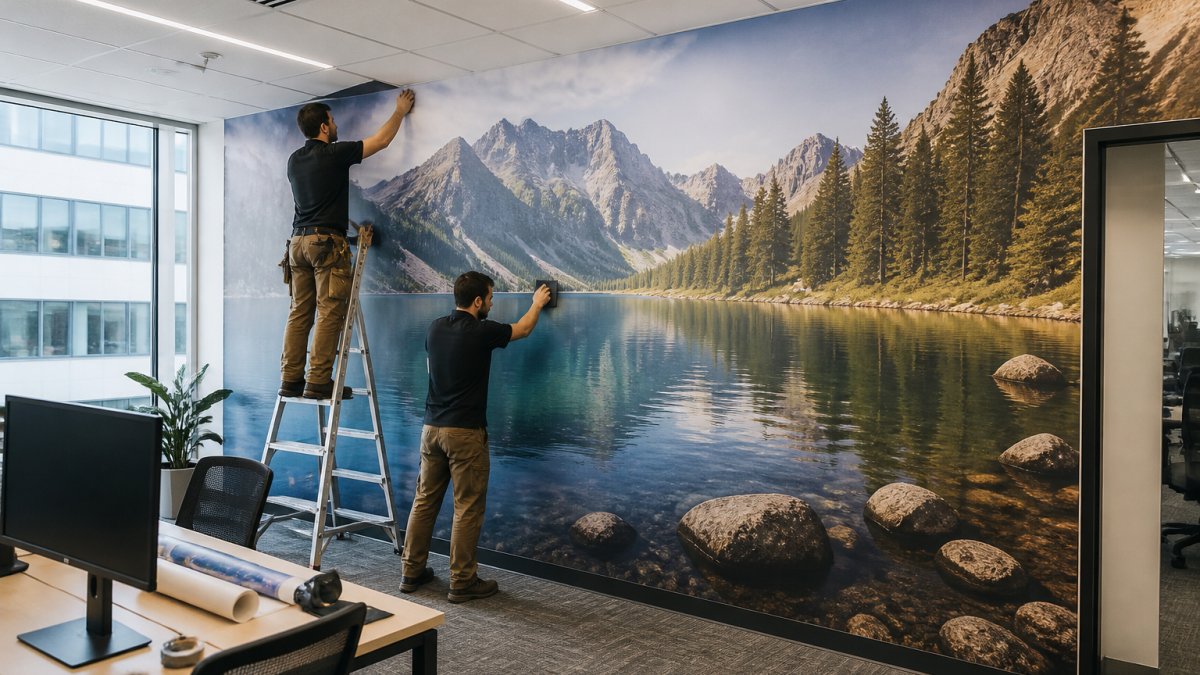
Last Updated: October 29, 2026
Quick Summary
To install large scale office wall murals, first prep the wall by cleaning, patching, and priming it, then choose the right material and tools before marking a plumb line for the first panel. Work in vertical strips, smooth each panel from the center outward to remove bubbles, and order 5-10% extra material for mistakes and repairs.
- Give primer a full day to dry before installation, since a wall that feels dry can still trap moisture.
- Buy extra blades and change them every few panels, because a dull knife tears material permanently.
- Order 5-10% extra material on any large office job to cover mis-cuts and future patch repairs.
- Install in vertical strips rather than horizontal rows, checking plumb as you go.
- Leave the most visible wall for last so the reception wall gets full attention if time runs short.
Table of Contents
- How to Prep a Wall for a Mural
- Wall Mural Installation Tools You Actually Need
- Measuring, Planning, and Aligning the First Panel
- Peel and Stick Mural Installation: Step-by-Step
- Smoothing Panels to Remove Bubbles and Wrinkles
- Large Wall Mural Installation Cost and Scheduling
- Plan Your Office Wall Mural Installation with Triton Sign
- Frequently Asked Questions
How to Prep a Wall for a Mural
Wall preparation for a mural means removing every obstruction and contaminant before the graphic touches the surface. Dust, grease, and old adhesive all block bond.
Start with a simple assessment:
- Check for moisture, cracks, and loose paint
- Remove old wallpaper and leftover adhesive
- Patch holes and sand rough spots
- Wipe the wall with a degreaser, then let it dry fully
- Apply a latex primer to seal porous surfaces
Bare drywall can absorb adhesive unevenly, and panels may lift at the edges.
Drying time matters as much as cleaning. A wall that feels dry to the touch can still hold moisture that traps air under the graphic.
Wall Mural Installation Tools You Actually Need
A tool list is the easy part. The harder decision on a large office wall is what the mural is made of and how it bonds, because that choice drives durability, cleanability, and how painful removal will be years from now. Pick the material first, then the tools follow.
Match the material to the office, not the catalog
Three installation systems dominate commercial wall murals, and each behaves differently in a busy workplace:
- Paste-the-wall (traditional wallpaper-style): Adhesive goes on the wall, the dry panel goes up. It is forgiving on large panels because the material stays flat and repositionable for a short window, and seams can be worked before the paste sets. It is the usual choice for full-wall, floor-to-ceiling graphics in conference rooms and reception areas.
- Paste-the-paper (pre-pasted or paste-applied to the back): Adhesive is applied to the mural backing. It suits textured or slightly irregular substrates better and lets installers control adhesive coverage, but it is messier and slower on tall walls.
- Peel-and-stick (self-adhesive vinyl): No paste, fast install, and removable, but the adhesive grabs immediately and can pull paint or leave residue on some finishes. Best for shorter-term campaigns, leased space, and walls you expect to repaint.
For high-traffic corridors, break rooms, and anywhere people brush against the wall, ask about a textured or laminated commercial vinyl with a protective overlaminate. It resists scuffing and can be wiped down, which matters in offices far more than in a home. Confirm the product’s fire rating and any low-VOC or GREENGUARD documentation your facilities team will ask for before you order.
The toolkit that actually gets used
Once the material is chosen, a focused kit covers most commercial installs:
- Tape measure, pencil, and chalk line for layout
- Spirit level and a laser level, use both, and trust the wall check over the laser
- Utility knife with fresh blades for trimming around outlets, trim, and corners
- Plastic squeegee (plus a felt-tip squeegee for peel-and-stick)
- Wallpaper brush for smoothing edges and seams
- Drop cloths to protect floors and furniture
- Clean rags and a mild adhesive remover for cleanup
- Low-tack tape to hold panels in place before committing
- Primer and the specified adhesive for paste-based murals
Buy extra blades and change them every few panels. A dull knife tears the material instead of cutting it, and a torn edge is permanent on a seam. For paste-based work, mix adhesive to the manufacturer’s ratio and keep a bucket of clean water and a sponge for wiping paste off the face of the mural before it dries.
Order 5-10% extra material on any large office job. Mis-cut panels, damaged corners, and future patch repairs are far cheaper to cover with spare stock than with a reprint run.
Substrate check before you buy
Material choice is wasted if the wall cannot hold it. Before ordering, confirm the substrate:
- Painted drywall: Sound if the paint is cured, adhered, and not glossy. Fresh paint needs to cure fully, often several days to a couple of weeks depending on the product, before any adhesive goes on.
- Concrete or masonry: Porous and often dusty. It usually needs a primer or skim coat to give the adhesive a consistent surface.
- Textured or knockdown finishes: Heavy texture telegraphs through thin vinyl. Use a heavier material or plan to smooth the wall first.
- Glossy or semi-gloss paint: Adhesive struggles to bond. Scuff-sand and prime, or choose a removable product rated for that finish.
- Moisture-prone walls: Any sign of dampness, efflorescence, or a cold exterior wall needs to be resolved before installation. Trapped moisture is the most common cause of long-term failure.
A simple tape test, press a strip of clear tape to the painted wall and pull, tells you quickly whether the paint is sound or will come off with the mural. If paint lifts, the wall needs prep before anything else happens.
Three installation systems dominate commercial wall murals, and each behaves differently in a busy workplace.
| Option | Best for | Key difference |
|---|---|---|
| Paste-the-wall | Full-wall, floor-to-ceiling graphics in conference rooms and reception areas | Adhesive goes on the wall; dry panel stays flat and repositionable briefly |
| Paste-the-paper | Textured or slightly irregular substrates | Adhesive applied to mural backing; messier and slower on tall walls |
| Peel-and-stick | Shorter-term campaigns, leased space, walls you expect to repaint | No paste, fast install, removable; adhesive grabs immediately |
Measuring, Planning, and Aligning the First Panel
The first panel sets the line for every panel after it. Get it wrong and the whole wall drifts off level.
Measure the full wall height and width before anything else. Then mark a plumb line down the center or from a chosen starting corner.
Plan panel order on the floor or a large table first. Lay panels out in sequence and check the pattern against your proof. This catches print errors before they are stuck to a wall.
A few planning rules:
- Start from the most visible corner
- Work left to right or right to left, never both
- Match pattern seams before peeling any backing
- Leave a small overlap at edges for trimming
Check the actual wall surface at several points first.
Peel and Stick Mural Installation: Step-by-Step
Peel and stick mural installation is faster than glue-based work, but it punishes rushing. The adhesive grabs quickly, and lifting a panel to reposition it can stretch the material.
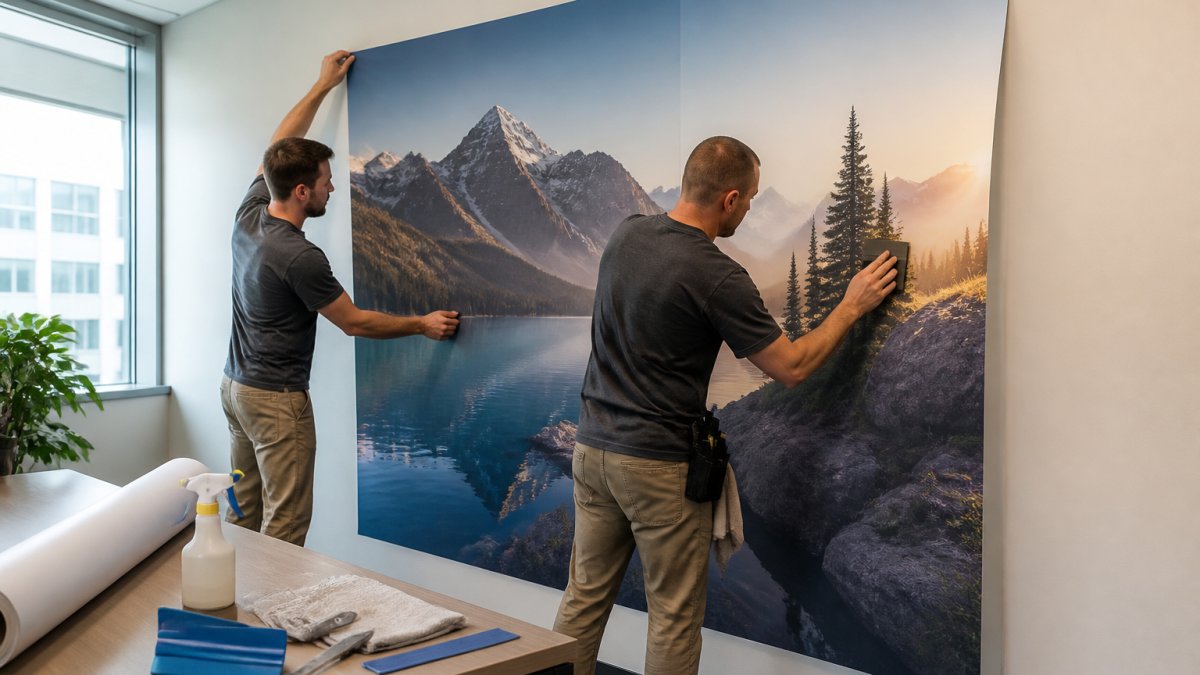
Follow these steps:
- Confirm the wall is clean, primed, and fully dry
- Mark your plumb line and panel boundaries in pencil
- Peel back the top few inches of backing paper only
- Press that strip to the wall along your line
- Smooth downward with the squeegee as you peel the rest
- Work out air from the center toward the edges
- Trim excess material at corners and outlets with a sharp knife
- Re-smooth edges and check for lifting
Apply gradually. Peeling the whole backing at once lets the panel fold onto itself and stick where you do not want it. If a bubble forms, lift the nearest edge and re-smooth rather than poking holes.
For high-traffic areas, durable vinyl graphics that survive busy offices are worth choosing up front.
Smoothing Panels to Remove Bubbles and Wrinkles
Most bubbles come from trapped air, not bad adhesive. A firm squeegee pass from the center outward pushes air to the edge before it is sealed in.
Work in small sections. Hold the squeegee at a slight angle and overlap each pass by half.
Wrinkles usually mean the panel is stretched or the wall is not flat. Small wrinkles often relax within a day as the material settles.
To keep branding tight across multiple panels, follow the same rules for keeping brand consistency across signs.
Large Wall Mural Installation Cost and Scheduling
A large office mural is a project. Planning wall sections, access, and safety can help organize the work.
Divide the wall into installable sections
Treat a long or tall wall as a series of panels and zones rather than one continuous surface:
- Map panel sequence on a printed elevation. Number every panel and mark seams, outlets, switches, and trim. This is your install map and your quality check.
- Set a working height limit. Anything above comfortable reach needs a ladder or scaffold, which changes the pace and the safety plan. Plan the upper band as its own pass.
- Install in vertical strips, not horizontal rows. Working top-to-bottom in a narrow strip keeps the material manageable and lets you check plumb as you go.
- Leave the most visible wall for last. If time runs short, the reception wall should be the one that gets full attention, not the corridor behind the copier.
Plan access around office operations
Scheduling an installation involves logistics as well as labor:
- Phase by zone. Install one wall or floor at a time so staff can keep working.
- Clear the work area first. Furniture, monitors, and wall-mounted equipment need to move before installers arrive. Confirm who is responsible for moving what.
- Protect power and data. Cover outlets and floor boxes, and confirm with facilities which circuits and network drops must stay live.
- Stage materials nearby. Large panels need flat staging space, a cleared conference room or a protected floor area, close to the wall but out of foot traffic.
- Build in cure and dry time. Paste-based murals need time for adhesive to set before furniture goes back. Do not schedule the all-hands meeting for the same afternoon.
Safety and crew roles
Tall walls and occupied offices raise real safety questions. Check with your facilities or safety lead before bringing equipment in:
- Assign roles. On a two-person crew, one positions and one smooths and trims. On larger jobs, add a spotter for ladder work and a runner for materials.
- Use the right access equipment. Step ladders for moderate heights, rolling scaffold or a scissor lift for tall walls. Never stand on furniture or the top rung.
- Ventilate. Adhesives and primers off-gas. Keep air moving and follow the product’s safety data sheet.
- Keep the work zone marked. Cones or tape around ladders and wet panels protect both installers and staff.
- Watch electrical fixtures. Turn off and cover fixtures near the work area, and never trim around a live fixture.
Do not install over or around energized electrical fixtures. Coordinate with facilities to de-energize and cover anything in the work zone before trimming begins.
Budget realistically
Cost depends on wall square footage, material, wall condition, access equipment, and labor. For pricing context on related signage projects, see cost factors for high quality business signage. For planning, consider the project scope and possible wall repairs.
Troubleshooting and repair after install
Installation issues can include:
- Bubbles: Small ones often settle. For stubborn bubbles, lift the nearest edge and re-smooth rather than poking holes.
- Lifting seams: Re-activate the adhesive per the manufacturer’s instructions and roll the seam flat.
- Misaligned seams: If the drift is small, work the seam with a squeegee; if it is large, the panel needs to come down and reset.
- Adhesive residue: Wipe with the manufacturer-approved remover, not a solvent that damages the print.
- Damage after install: Patch from spare stock and blend the seam, which is why ordering extra material up front pays off.
Plan Your Office Wall Mural Installation with Triton Sign
Office wall mural installation involves preparation and care.
We have over 30 years of combined sign and display experience. Our full-service design, fabrication, and installation services are available for signage and graphics projects. We are committed to reliable project completion within tight deadlines and budget constraints.
Before you commit, measure the ROI of office interior branding so your project has internal backing.
Get started with Triton Sign to explore branded office wall graphics.
Frequently Asked Questions
How do you prepare an office wall for a mural?
Wall preparation can include removing obstructions, patching holes, and cleaning the surface. Contact Triton Sign to discuss your project.
What tools do you need to install a large wall mural?
The tools needed depend on the mural and installation plan. Contact Triton Sign to discuss your project.
How do you prevent bubbles and wrinkles when installing a wall mural?
Installation methods depend on the mural and wall. Contact Triton Sign to discuss your project.
How much does it cost to install a large wall mural?
Contact Triton Sign for a quote based on your project.
