Table of Contents
- What You’ll Need Before You Start Designing
- Vehicle Wrap Design Best Practices That Drive Results
- How to Design Effective Vehicle Wraps for Small Businesses: Step-by-Step
- Commercial Vehicle Wrap Design Examples That Work
- How Long Do Vehicle Wraps Last and What Affects Durability
- Legal Compliance and Material Selection for Vehicle Wraps
- Tracking ROI and Budget-Friendly Design Strategies
- Common Mistakes to Avoid in Vehicle Wrap Design
- Frequently Asked Questions
Last Updated: September 24, 2026
What You’ll Need Before You Start Designing
Designing effective vehicle wraps for small businesses starts with the right materials before you open any design software. At Triton Sign, we’ve seen too many wraps fail because the design phase skipped basic prep work. A vehicle wrap is a mobile billboard that travels thousands of miles a year, so the files behind it must be right from day one.
Here’s what you need on hand:
- Vehicle template for your exact make, model, and year
- Vector logo files in AI, EPS, or SVG format
- Brand color codes in CMYK or Pantone values
- High-resolution photos at 300 DPI or higher
- A written list of every phone number, website, and service you want shown
Ask your print shop for the vehicle template before you design anything. Templates show door handles, fuel doors, and body curves that swallow text if you ignore them.
Vehicle Wrap Design Best Practices That Drive Results
Good vehicle wrap design follows a few rules that separate wraps people remember from wraps they never notice. A driver gets three to five seconds to read your vehicle, so every choice should serve that window.
Limit Text and Build Visual Hierarchy
Visual hierarchy means arranging design elements so the eye lands on the most important message first. Most small business wraps cram in every service, certification, and phone number. That approach fails.
Aim for this structure:
- Primary message: your company name and core service, largest element
- Secondary message: one key benefit or tagline
- Tertiary details: phone, website, and license number
Choose Fonts for Legibility at Highway Speeds
Font readability decides whether your wrap works at 60 mph or only when parked. Thin scripts, all-caps blocks, and decorative fonts disappear at distance.
Follow these rules:
- Use bold sans-serif fonts for main text
- Keep letter height at least 2 inches for every 10 feet of viewing distance
- Avoid more than two font families per wrap
- Test your design from 50 feet away before approving it
How to Design Effective Vehicle Wraps for Small Businesses: Step-by-Step
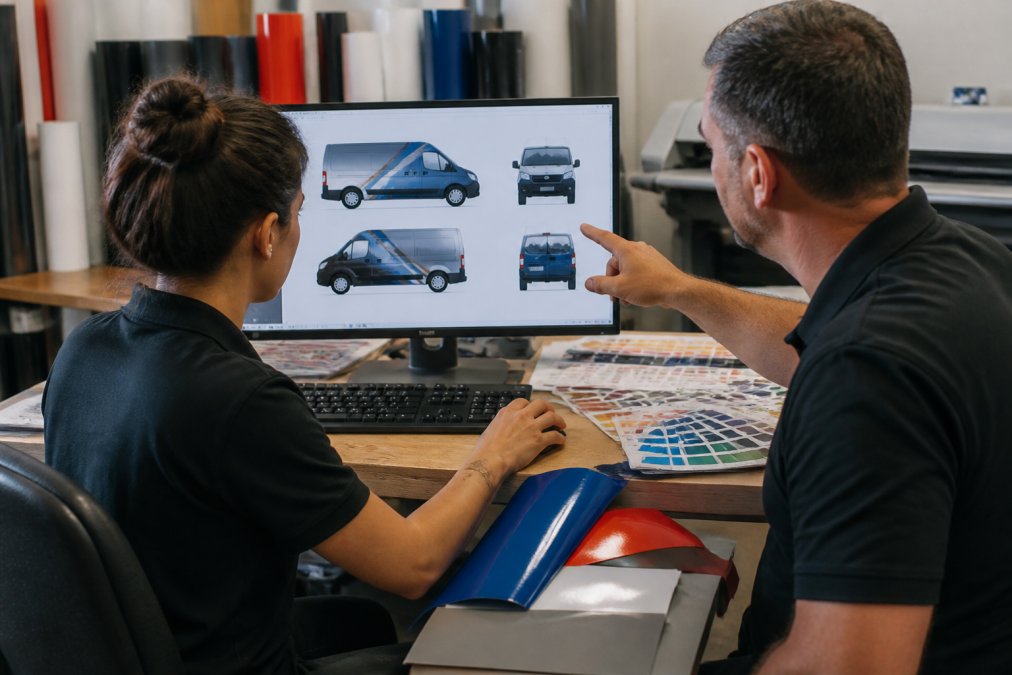
The design process moves through three phases: brand setup, file preparation, and message placement. Skipping one shows up in the final print.
Step 1: Define Your Brand Identity and Color Palette
Start with your brand identity. Pull your exact logo, official colors, and brand messaging into one folder. Consistency across your commercial fleet builds recognition faster than any single clever design.
Step 2: Prepare Print-Ready Files and Vector Graphics
Print-ready files prevent expensive reprints. Your designer should deliver vector graphics at full wrap scale with bleed lines.
Check these items before sending files to print:
- All logos converted to vector format
- Images at 300 DPI at final print size
- Colors set in CMYK, not RGB
- Fonts outlined or embedded
- A design proof approved by your team
Step 3: Place Contact Information and Calls to Action
Contact information belongs in predictable spots. Put your phone number and website on the rear and both sides, where other drivers actually see them. A clear call to action, like “Call for a Free Estimate,” gives viewers a next step.
Commercial Vehicle Wrap Design Examples That Work
Strong commercial vehicle wrap design examples share one trait: instant clarity. A plumbing company that wraps its vans in bright blue with a giant phone number beats a cluttered design every time.
Think about what works in your category:
- Service businesses: bold color, huge phone number, simple icon
- Food trucks: appetizing photography, short menu highlights
- Contractors: project photos, license number, service area
How Long Do Vehicle Wraps Last and What Affects Durability
Most quality vehicle wraps last five to seven years with proper care. Several factors shift that range.
- Vinyl quality: cast vinyl outlasts calendared vinyl
- Sun exposure: constant UV light fades colors faster
- Washing habits: hand washing beats harsh brushes
- Parking: garages protect wraps better than street parking
- Installation quality: a clean, professional vinyl application prevents peeling
Legal Compliance and Material Selection for Vehicle Wraps
Legal compliance trips up more small businesses than design problems do: a wrap sits at the intersection of vehicle registration, advertising law, and insurance. Get any one wrong and you can be pulling vinyl off a truck you just paid to wrap.
Registration and Signage Rules to Check First
Start with how your state classifies the vehicle once it carries commercial messaging. Many states require commercial registration or plates once a vehicle is used principally for business, and a wrapped vehicle is often the trigger. Rules vary, so confirm with your state motor vehicle agency before you print.
Then check these common pressure points:
- Window coverage limits. Most states restrict how much of the windshield, front side windows, and rear window can be covered or tinted. A wrap that crosses onto glass can fail an inspection even if the vinyl itself is legal on the body.
- Reflective and identification requirements. Some commercial vehicles, particularly those above certain weight classes, must display reflective tape, USDOT numbers, or company name and city in a specific size and location. Your wrap design has to leave room for those, not cover them.
- Municipal advertising ordinances. A handful of cities restrict mobile billboards or off-premises advertising. A wrap on a vehicle that is primarily parked as a sign can fall under different rules than one that drives a route.
- State and federal mark requirements. If you operate across state lines or haul regulated goods, additional marking rules may apply on top of your state’s.
Skipping a compliance check can mean removing a brand-new wrap or failing an inspection. Confirm registration class, window limits, and any required identification markings before you approve the design proof, not after installation.
Insurance and Liability Implications
Tell your insurance carrier that the vehicle is wrapped and used for business. A commercial auto policy may treat a wrapped vehicle differently than a personal one, and unreported business use can complicate a claim. Ask two questions: does the policy cover the wrap as a physical damage loss, and does the business-use classification change your premium?
How Material Choice Changes the Design
Material selection directly constrains what your design can do and how long it survives.
- Cast vinyl is thinner, conforms to curves, rivets, and deep recesses, and holds its shape over time. It costs more but is the standard choice for full wraps and complex body panels.
- Calendared vinyl is thicker, less conformable, and tends to shrink back over time. It works well on flat panels and simple partial wraps, and it costs less.
- Finish changes the design. Gloss reflects light and can wash out fine text on a sunny day; matte reduces glare and reads well for photography-heavy designs but shows fingerprints and smudges more. Specialty finishes like chrome or color-shift are striking but harder to keep clean and often carry a shorter expected life.
- Laminate is not optional for a working vehicle. A UV laminate protects color from fading and adds scratch resistance. Skipping it saves money up front and costs you years of usable life.
Tracking ROI and Budget-Friendly Design Strategies
Most wrap guides stop at aesthetics. The gap they miss is that a wrap is a marketing asset with a measurable cost per lead, and if you don’t build tracking in before the vinyl goes on, you can never prove it worked.
Build Attribution Into the Design
You cannot track a wrap after the fact. The tracking has to be designed into the wrap itself. Three mechanisms do the work:
- A dedicated phone number. Use a separate tracking number (a call-tracking service or a second line) that appears only on the wrap. Every call to that number is a wrap-generated lead by definition.
- A dedicated landing page or short URL. Point the wrap’s URL to a page that exists only for the wrap, such as yourdomain.com/van. Compare its traffic and form fills against your main site.
- A unique offer or promo code. “Mention this van for $25 off” gives walk-in and phone customers a reason to self-identify as wrap leads.
What to Measure and Against What
The metric that matters is cost per lead, compared with your other channels. A simple framework:
- Total wrap cost (design + material + installation) divided by leads attributed to the wrap over a set period gives you cost per lead.
- Compare that number to your cost per lead from paid search, direct mail, or social ads.
- Track leads by month for the first six months to see whether the wrap is still generating after the novelty fades, it usually is, because the vehicle keeps driving.
Budget-Friendly Strategies That Do Not Look Cheap
For a micro-business, the goal is a professional look at a partial-wrap price. These moves get you there:
- Partial wrap on high-visibility panels. Cover the rear and both sides, the surfaces other drivers actually see, and leave the roof and hood in the base paint color. You get most of the recognition at a fraction of the material and labor.
- Use the vehicle’s existing color as a design element. If the van is already white or black, design around it instead of paying to cover it. A two-color design on a white van reads as intentional, not unfinished.
- Standard vinyl colors instead of custom matches. A close standard color is often indistinguishable on the road and avoids custom-mix minimums.
- One design, reused across the fleet. The design cost is paid once; every additional vehicle is material and install only. Consistency also compounds recognition.
- Bundle design with installation. Splitting design and install across two vendors usually adds coordination cost and rework. One provider who owns both can catch template and material conflicts before they become reprints.
The Payback Math
A wrap is a capital asset with a multi-year life, not a monthly ad buy. Spread the total cost across the expected service life (commonly five to seven years) and compare that annualized figure to short-lived campaigns. For most small businesses with a vehicle already on the road daily, the wrap wins on cost per impression, but only if you tracked the leads to prove it.
Common Mistakes to Avoid in Vehicle Wrap Design
The biggest mistakes in vehicle wrap design come from treating the wrap like a print ad instead of a moving sign. Here are the ones we see most.
- Too much text: drivers can’t read paragraphs at speed
- Low-resolution images: pixelated photos look unprofessional
- Poor color contrast: text vanishes against the background
- Ignoring the template: text lands on door seams and handles
- No clear call to action: viewers have no next step
- Inconsistent branding: each vehicle looks like a different company
The best vehicle wraps for small businesses do three things well: they show the brand clearly, they stay legible at speed, and they give viewers one obvious way to respond.
Frequently Asked Questions
How much information should I include on a business vehicle wrap?
Keep it minimal. Your logo, a short tagline, a phone number or website, and one clear call to action are enough. Most viewers see your vehicle for only a few seconds, so every element must be readable at a glance. Limit text to seven words or fewer per side and let the graphics carry the brand message. Overloading the design with services, addresses, and multiple phone numbers reduces legibility and weakens the overall impact of your vehicle wrap.
What is the difference between a partial and full vehicle wrap for branding?
A full wrap covers the entire vehicle body with vinyl, giving you maximum space for brand colors, graphics, and messaging. A partial wrap covers only specific areas such as doors, rear panels, or the tailgate, leaving the original paint visible. Partial wraps cost less and work well for small businesses testing vehicle advertising for the first time. Full wraps deliver stronger brand consistency across a commercial fleet and turn each vehicle into a true mobile billboard.
How do I ensure my vehicle wrap design is readable at highway speeds?
Use high color contrast between text and background, choose bold sans-serif fonts, and keep the most important information large. A general rule is one inch of letter height for every ten miles per hour of viewing speed. Avoid thin scripts, intricate details, and low-contrast color pairs like light blue on white. Test your design by shrinking it to business-card size; if you cannot read the phone number or tagline, drivers on the highway will not either.
What are common vehicle wrap design mistakes to avoid?
The most frequent mistakes include using low-resolution imagery that pixelates when enlarged, cramming too much copy onto the panels, ignoring the vehicle template so key elements fall on curves or handles, and choosing colors that clash with your brand identity. Another common error is skipping a design proof before printing. Always request a scaled proof on the actual vehicle template and review it from multiple angles before approving production.